
Friday, May 28, 2010


Tuesday, February 2, 2010
Art or...?
On our travels this weekend we went to a house where my friend Bear was house-sitting. Part of the directions to the house were, "if you don't see a bunch of strange sculptures in the driveway you are in the wrong driveway."
When we got there we knew immediately we were in the right place. They were fantastic. Life sized elephants and giraffes.

Crocodiles guarding the fish pond.

My favorite was this large cat on a branch bolted to a tree. The day was ending and I couldn't get a good shot even though I think I tired at least a dozen times.

Being an art teacher I was very impressed with this private collection. I must admit, however, I am used to having to treat artworks with a degree of respect. I found, winding up the driveway, that the owner of these pieces must not feel quite the same way. His sense of humor not what I am used to in terms of artwork display.

His rhinoceros was chewing on a pair of panties. That made me giggle. The belly laughs came from the other side of the street.

Saturday, January 23, 2010


Friday, January 22, 2010
Desmond Tutu
This is a very easy tutuorial (wah ha ha ha, I so funny).




All done. Find a cute little bum (yours even, still not judging) and dance...


Get some elastic from the easiest source you can. WalMart, JoAnnes, Spotlight, those old sweat pants that don't fit anymore. Measure the elastic for the right size of the desired tutu recipient (I won't judge you if you want to make this for yourself).

Sew the elastic together. I decided to use a zig-zag stitch but any stitch will do. You could even hand stitch this if you don't have a sewing machine. If you are really lazy, I suppose even a stapler would do the trick here. Just don't blame me if it doesn't last as long.

Get a large pile of tulle. I got this in the remnants bin at WalMart for under a dollar. I think it was just under a yard. If you would like your tutus longer than what mine turned out you will need to buy more tulle, I used every last scrap of this pile. It really is cheap so it won't break the bank.

Cut it up into a pile of strips. They don't have to be perfect or even close to perfect, they just have to be strips.

Fold the tulle in half, loop it around the elastic and make a half hitch.

I found it worked much better if I tightened the half hitch around my thumb, instead of the elastic alone.

Work the half hitches closely together.

In no time you will have a cute little tutu like this. In the picture above you can see the loops of the half hitches. If you turn the tutu inside out at this point you get a nice finish like the picture below.

At this point it could be finished but...

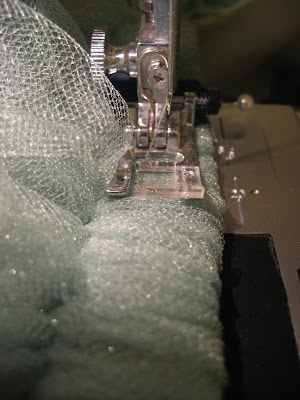
if you want it to be a little more secure or add some nice ribbons you can sew the entire band with a loose zig-zag stitch.

The zig-zag stitch ensures that you will still be able to stretch the elastic without breaking the thread. So, please don't use a straight stitch here.

All done. Find a cute little bum (yours even, still not judging) and dance...

dance...

dance...

dance.
The crazy thing here is like the kids at Christmas who get an expensive toy and end up playing in the box. The girls love these tutus and overall they took less than two hours to make, with interruptions. However, those capes that I made, that took an entire day, still sit unused.
Go figure.
Tuesday, January 12, 2010
How To Be An Amateur Seamstress
Just to show you what a fraud that I am.

1. Pick a pattern that you are not going to follow. Even though I didn't follow the directions or even use the pattern pieces that they wanted me too it was loads easier than doing it all myself.
2. Lay pattern on your material, in this case a dress that I loved when I was just barely a teen. I absolutely adore this dress print pattern.

3. Pin the pattern and the material to the carpet in much the same way you might put it on cork-board

4. Trace around it in permanent marker pen. It will all hide in the seam allowance anyway and it is so much easier to see when doing the next step.

5. Cut out the pieces.

6. Admire your first pile of pattern pieces.
7. Repeat for the lining.
Remember that ironing is for sissies and who cares if the material has wrinkles, it only has a small chance of making the pattern pieces irregular. Any clothes in my wardrobe that require ironing sit unused for a few years until being donated to charity.
Sometimes I don't act like an amateur and actually use the right tools. One great one is this blue pen.

Unlike the permanent marker in the previous photos, this pen is water-soluble and will wash out in the laundry or if you can't wait that long you can spray it with a spray bottle.

Also, one very very important step is to pin pin pin. Please pin your work. Right, Courtney?

9. Sew

10. And sew.
Until you get these happy kids.


This has got to be my favorite photo of Suzie to date. I am considering having it framed. At least I am going to put it as my wallpaper on my computer.


They have better clasps now. After a trip to JoAnne's I was able to replace the alligator clips with something a little more classy. If the kids actually wore the capes I could get another picture, but alas.
Friday, January 8, 2010
Fish Scale Scarf

Claire is modeling for me today. She is wearing a scarf that I crocheted and every time that I have worn it I have received compliments on it. So I decided to share what is very quick to make if you know how.
If you don't know how and are trying to make it without a pattern (no patterns seem to be my pattern) then it might take you an entire night of crocheting and pulling out. The second night, however, your scarf will grow quickly.
Let me save you some time so that you can do this in one evening instead of two.
If you have never crocheted but have wanted to learn, YouTube has some great videos that demonstrate the basics and this pattern is super simple to start with. If you live in Perth we can trade services. I need a housekeeper.
I used a H/8 or 5.00mm needle and worsted weight %100 cotton yarn.

1. Chain to your desired width as long as you have multiples of four, 8, 12,16, 20, 24, etc plus 2. The rest of the pictures are done on a chain of 24.


2. Single crochet in 3rd chain from hook.

3. Chain 3


4. Single crochet in 4th chain from the last single crochet.
5. Continue steps 3 and 4 until you get to the end of the chain.

6. At the end of the row, after the last single crochet, chain 2.
7. Turn

8. Single crochet in the hole made by the chain 3.
9. Chain 3.

10. Single crochet in the hole of the next chain 3 on the bottom row.

Lather, rinse, repeat.
Just remember that at the end of the row only chain 2 before the turn. It leaves 1/2 sized holes on the end for the net/staggered look.
This pattern has not been tested and if anyone is brave enough to attempt it and finds an error, please let me know so that I may correct it.
Monday, December 21, 2009
F

F is for flag and lots of fish. Oh, and the F is actually fuzzy.

Fishing pole fishing fish out of a fish bowl.


Now I realize the flags are not the same size. I was worried that Shannon would give me crap because the US flag is bigger than the Aus flag. I could not find a smaller US flag, and the Aus flag I had in that same collection with the doggie from D for years as well. It is very hard to find any flags besides US and state flags while in the US. I know, Shannon, it is those ego-centric Americans again, thinking they are the only country in the world.
So my solution was to put the Aus flag higher on the page than the US flag. Then it got me worried about being disrespectful to the US flag while we were still in the US. Since Australians do not have the same respect for their flag that Americans have for theirs, then Australians shouldn't worry about being lower.
I thought a lot of things but basically what I learned is that politics don't mix with anything, even crafts. So, damn you politics, I don't care I will do what I want. Suck it.
I still look at them and think that I should rip them both off and just have a fishing page. Ugh.
The fishing pole is just a coat hanger that is bent to have a small circle just where it attaches to with the button reel. Sew on the button through the small circle and viola you have a pivoting fishing rod. The fish bowl is made with small scraps of clear vinyl, zig- zagged on with 'invisible' thread that is used by quilters.
Subscribe to:
Posts (Atom)